
If you have installed Ubuntu Linux in a virtual machine on VirtualBox you will surely realize that by default its resolution is set to 640×480, very poor for any type of use.
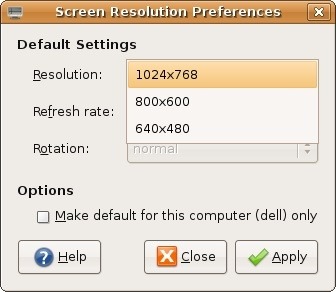
You will have also noticed that going on the screen settings it is not possible to change this resolution from the dropdown.
To change the displayed resolution at will, proceed as follows:
Open a terminal and
Acquire root rights
sudo su
Update the repo
apt-get update
Install the VirtualBox Guest Additions
apt-get install virtualbox-guest-dkms
Restart the system.
The resolution should now change automatically, but if it doesn’t, just go to the control panel and screen settings: the dropdown will now be enabled.
NOTE: as an alternative to the Additions command it is possible to ‘mount’ the additions disk on the VM directly from the Virtualbox tools menu; a window will appear on the screen asking if you want to install the addons, you have to click on yes and reboot.
IN CASE IT DOESN’T WORK:
when the VM is off, go to the VM settings and make sure to have in the ‘Screen’ section the video memory at maximum (usually 128Mb); moreover the 2D and 3D video acceleration tick must be empty.
In this case repeat the procedure.